Friday 23 December 2016

Allergy Friendly Gingerbread House and Gingerbread Man

Hello again! Here is an easy peasy recipe for you to try as it's Christmas!


Here is how you can make one too!

Ingredients:

  • 288g Plain Flour (This recipe will work using an All Purpose Gluten Free Flour Blend too, without needing extra xanthum gum)
  • 165g Brown Sugar
  • 170g Vegan Margarine (we used Dairy Free Vitalite)
  • 85g Golden Syrup (Increase to 90g if making gluten free)
  • 1tbsp Ground Ginger (Increase to 1.5 tbsp if making gluten free)
  • 1tsp Cinnamon (Increase to 1.5 tsp if making gluten free)
  • 1/2 tsp Bicarbonate of Soda
  1. Get a large bowl and stir until doughy - you can use your hands to knead it together, if you don't mind getting messy.
  2. Roll out and cut shapes for the four sides ,with two sides for the roof. You can find a template online, or you can use a silicone mould like us, which made it a lot easier.
  3. If you aren't using a silicone mould, make sure you put the pieces on some baking paper and grease them with your vegan margarine.
  4. Next bake the pieces for about 15 minutes, at 170 degrees in a pre-heated fan oven, until golden brown. They still feel a bit soft, but will get harder as they cool down.
  5. Now let the pieces cool.
  6. Once they cool you need to pipe along all the sides,and press them together. You can use ordinary icing sugar, but mix it up with very little water so that it is very, very sticky. If you don't have a piping bag, cut a small hole in the corner of a plastic food bag and use it in the same way.
  7. Then ice the edges of the roof pieces and add the roof parts to your house.
  8. Finally, decorate with more icing and sweets and enjoy!
  9. Then eat it with your family.

Hope you enjoy your baking!

Merry Christmas and a Happy New Year!

Love from Princess E! xxx

Sunday 11 December 2016

Allergy Friendly Chocolate Yule Log

Sorry I wasn't on here for a while. I have been very busy, and sometimes cooking experiments don't workout the way you thought they would. Anyway, I now have a cool new recipe for you to try! It is a fantastic allergy friendly chocolate yule log!


Here are the ingredients :-

For the cake


  • 145g self raising flour (you can use gluten free flour, but will need to add 3/4 tsp xanthum gum too) 
  • 80g  soft brown sugar
  • 2 tbsp cocoa powder
  • 1/2 tbsp baking powder (gluten free if needed)
  • 1/2 tsp cinnamon
  • 1/4 tsp salt
  • 185 ml cold black coffee
  • 3 tbsp oil (sunflower, coconut or rapeseed all work well)
  • 2 tbsp apple and pear puree (We used some from one of Princess M's baby fruit pot)
  • 1 tsp vanilla  

  
For the filling and topping

  • 200g of dairy free butter or vegetable shortening (Dairy Free Vitalite or TREX)
  • 200g icing sugar
  • 200g allergy friendly dark chocolate - suitable to individual needs.
  • 2 tbsp chicory and coffee essence (Camp)
  1. We got a large mixing bowl and mixed the dry ingredients together well.
  2. We mixed all the wet ingredients into a jug.
  3. Next, we lined a baking pan with grease proof paper and greased it slightly with dairy free Vitalite.
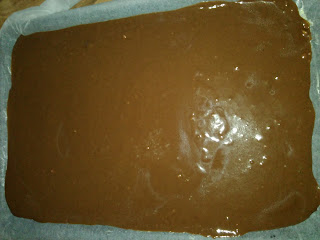
  4. Then, we poured the wet ingredients into the bowl of dry ingredients and mixed them together into a batter. 
  5. We poured it onto the rectangular baking tray and put in the oven for around 5 mins at around 170 degrees, in a fan oven (keep an eye on it!) You will know it is ready when the cake pulls away from the edges of the pan.
  6. Next we let it cool, for 5 minutes maximum, before placing another sheet of grease proof paper over the top.
  7. We flipped it over, whilst holding the new sheet of paper over the top of the cake, to fall gently onto the grease proof paper below.
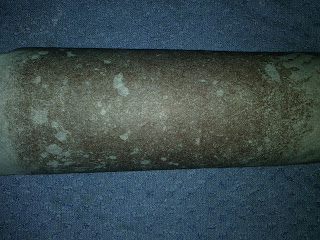
  8. Then we rolled the cake up, inside the paper, and left it to cool.
  9. After it had cooled, we put the butter into a bowl  and mixed it with icing sugar before we added the coffee essence.
  10. Mummy melted the chocolate in the microwave 20 seconds at a time because if not it would have boiled.
  11. We added the melted chocolate to our frosting mixture a few spoonfuls at a time, to stop it melting the frosting. It had to then sit in the fridge for a while to set.
  12. We then carefully unrolled our cake and spread part of the mixture inside it. The we rolled it back up again. Don't worry if your cake cracks a little, like ours did - you won't be able to see it once you have rolled it back together and iced the top!
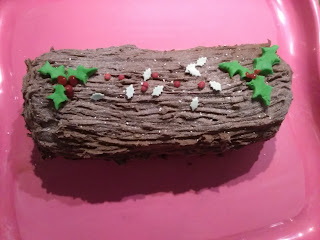
  13. Then we put the rest of the frosting on the top and sides and made a bark like pattern in the mixture by running a fork across the frosting.
  14. Finally, sieve a little bit of icing sugar over the yule log. You can put any decorations you like on there.  We put on fake holly and berries with some sprinkles!
I hope that you really enjoy making and eating this yummy scrummy yule log soon!

Love from Princess E!

(PS - Daddy and I have been experimenting with how to make allergy friendly truffle style chocolate. I will be sharing our success with you soon!)